WordPress Creating Custom Posts with Formidable Forms
In the previous tutorial, I showed you how to define a custom post type with CPTUI and Advanced Custom Fields. It should be noted here that neither of these plugins is necessary if you know a little PHP and some of the basic WordPress function calls. In this tutorial I’m going to show you how to extend the previous tutorial to create Custom Posts with Formidable Forms.
I’ve targeted these exercises to WordPress administrators who may not be at total geek-level, hence the use of plugins.
If you’d completed the previous tutorial, you would have gone through the process of using CPTUI to create the Custom Post Type, and Advanced Custom Fields to create the fields that were to be used in each Testimonial.
At this point, you would only have been able to add a new Testimonial whilst logged-in to your WordPress site as an administrator. This is great if you’re happy to collect testimonial content from your emails and manually add each one yourself.
But there’s an easier way – just get the person who’s giving you the testimonial to fill in the information themselves!
Goals.
- Create a front-end form to collect Testimonial content from any user.
- Save the collected data for re-use at any time (ie: marketing campaigns).
- Automatically create a new Testimonial Post, saved as a draft pending Administrator approval.
You can create custom posts with Formidable Forms! It might seem a complex process, but just imagine the control you’ll have with content!
Tools.
We’ll be using the setup created in the previous tutorial:
- To create the Custom Post Type, we used CPTUI (open source)
- To create the Custom Fields, we used Advanced Custom Fields (open source)
- To create the user form, we’ll use Formidable Forms.
The open source (free) version of Formidable Forms doesn’t have the capability to generate Custom Post Types, so we’ll be using the Pro Version (Single site license $49).
I know it might be a bit of a stretch to ask you to go buy a plugin in order to do a tutorial, but trust me – it’s one of the best form plugins you’ll ever buy and I promise you won’t regret it!
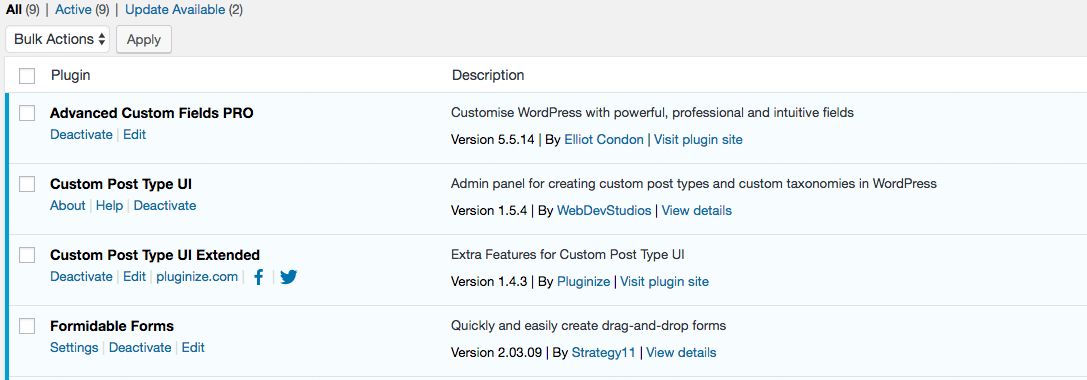
Installing Plugins.
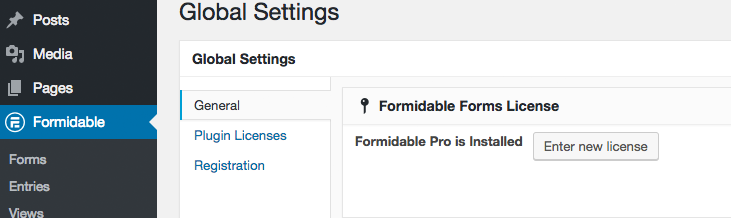
 I’ll presume that you’re already familiar with installing plugins. When you’ve purchased your Formidable Pro License, install the plugin and activate the license.
Advanced Custom Fields.
You should now review the custom fields that you created in the previous tutorial. You should also have a look at the default page that you use to create a new Testimonial Post in the WordPress Admin Dashboard. You’ll note that all the custom fields that you created appear as fields ready for you to add content.
Remember that the goal of this tutorial is for a new Testimonial Post to be created on the browser front-end, not via the Dashboard. In order to make this happen, we have to map all the fields created in the Advanced Custom Fields panel to form elements made in Formidable Forms.


Creating the form.
Hit the Formidable menu item on the Dashboard, then add a new Form. This gets you to the first section of the form building environment (Build). Note that you have six sections in the tabbed menu. We’re mainly going to be concerned with the first two – ‘Build’ and ‘Settings’.
Use the fields block to add a new Single Line Text field. Whilst the new element is selected, change the name to ‘First Name’. Remember that the plan here is to map the names of the fields you create here to custom fields created in the last tutorial. If you click the ‘Field Options, you can set various parameters on each field, including ‘required’.
Continue to add fields based on the type you created in the Advanced Custom Fields setup. For instance, the ‘Job Type’ field should be a Dropdown (Select) , and you can set the values as you like.
The Testimonial Type radio buttons are going to have a special purpose – we’re going to extract the custom Post Taxonomy (the Testimonial Post categories) and have these values automatically populate so that when the post is created, it’ll automatically be assigned to one of those categories.
If you want to create Custom Posts with Formidable Forms you must map the custom fields created with Advanced Custom Fields to form elements created in Formidable Pro.
Create the following fields:
- First Name : Single Line Text
- Last Name : Single Line Text
- Email Address : Email Address
- Testimonial Type : Radio Button (Leave the choices blank – these will be auto-populated)
- Company Name : Single Line Text
- Job Type : Dropdown (Residential, Commercial – or whatever you choose)
- Rating : Scale (Add the range in the field options )
- Message : Paragraph Text
- Image Upload : File Upload (set file types and max file size in the field options)
Have a look at the following image to see whether you have things set up right.


Setting the form to create the Custom Post Type.
When you hit the ‘Create’ button in the previous step, you’ll notice that you were bounced to the ‘Settings’ tab of the form.
Now click the ‘Form Actions’ item on the left. This is where we’ll define what happens to the information in the user-completed form.
By default, there’s an action that automatically sends an email to the site administrator. The one we want to use is the ‘Create Post’ action. Go ahead and click it.
Choose the following values from the choices available in the dialog box:
- Label : Create Testimonial Post
- Post Type : Testimonial
- Post Title : Testimonial Title
- Post Content : Leave blank – this will be extracted from custom fields
- Excerpt : Leave blank (but you could have easily made a custom field for this)
- Post Password : None
- Slug : Automatically Generate from Post Title
- Post Date : Date of entry submission
- Post Status : Pending (So you can manually approve any new posts)
- Taxonomies/Categories : Testimonial category > Testimonial Type (this picks up from the radio buttons in the custom fields)

Mapping Custom Fields.
In the last tutorial you created a swag of custom fields – First Name, Email etc…we’re going to reference those now and map them to our Formidable form elements.
In the Custom fields section, add a new line for each of the following entries by clicking the ‘+’ button and typing in the exact slug reference from the Custom fields created in the previous tutorial and then mapping the Formidable Form field to it:
- first_name : First Name
- last_name : Last Name
- email_address : Email Address
- company_name : Company Name
- job_type : Job Type
- rating : Rating
- message : Message
- _thumbnail_id : Image Upload (This will be used as the Featured Image)

Creating a page to host the new form
Create a new page in the usual way. Give it a title and assign a page template as required.
Then in the Visual or Text composer, click the Formidable button to add your new form. Publish the page, and start adding a new Testimonial!
Once you’ve added all the details, click the submit button.

Approving the Testimonial
It just wouldn’t do to allow anyone to publish content directly on your website without your say-so, and that’s exactly why we defined the status as ‘pending’ when we were mapping the fields in the last step.
If you flip back to your dashboard and check the Testimonial tab, you’ll see that there’s a new one waiting for your approval. Click to edit and see that all the data that you entered in the front-end form is there, including the Featured Image.
Publish the post if you’re happy with how it looks, and then browse to [yoursitename]/testimonials. If you set up the archive page in the previous tutorial, you should see a link to the post, and when you click that link, the post itself!


 | © 2014 John Ryan Design | All Rights Reserved | 100 percent Australian |