WordPress website migration
A number of my students this week asked me for a set of step-by step instructions on how to perform a Wordpress website migration successfully.
Although there are many ways to achieve this through WordPress plugins and server-based processes, what I’ve decided to do is show how you can achieve this with simple file and database backups.
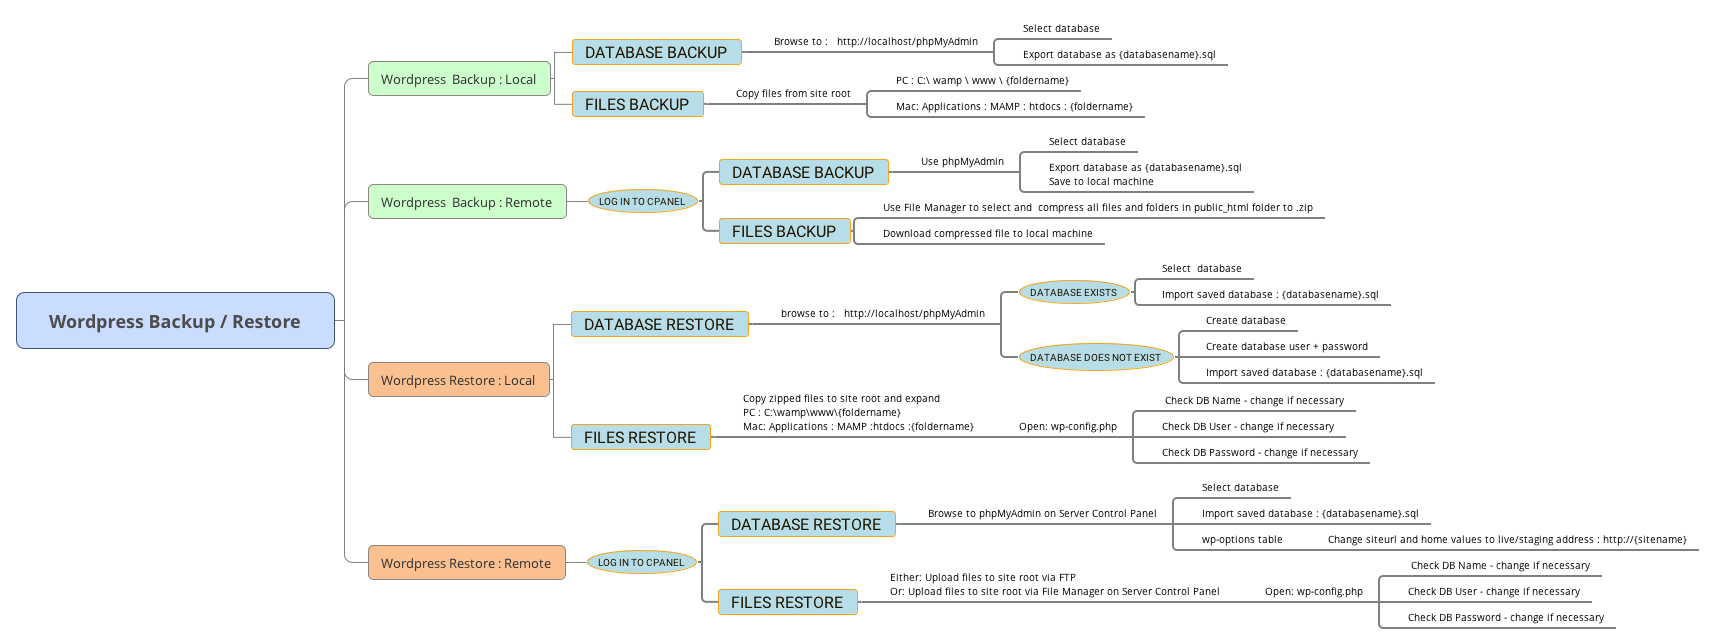
Essentially, a successful WordPress website migration involves the following steps (performed on either local, staging or live server) :
- Back up the WordPress files on the current server .
- Back up the database on the current server.
- Move the files to the destination server (via Control Panel File Manager, or via FTP).
- Import the database to the destination server using phpMyAdmin.
- Change the wp_options table on the destination server to correctly reflect the siteurl and home variable values.
- Change the wp-config.php file on the destination server to correctly reflect the database name and user credentials.
Scenario 1: Migrating a local WordPress site to a remote server (either staging or live).
Prerequisites:
A local server must be installed and running on the local machine. (ie MAMP on Macintosh, WAMP on windows).
A remote server must exist – either as a regular domain (http://mysite.com) or as a subdomain (http://test.mysite.com) or even as a folder within a domain (http://mysite.com/test)
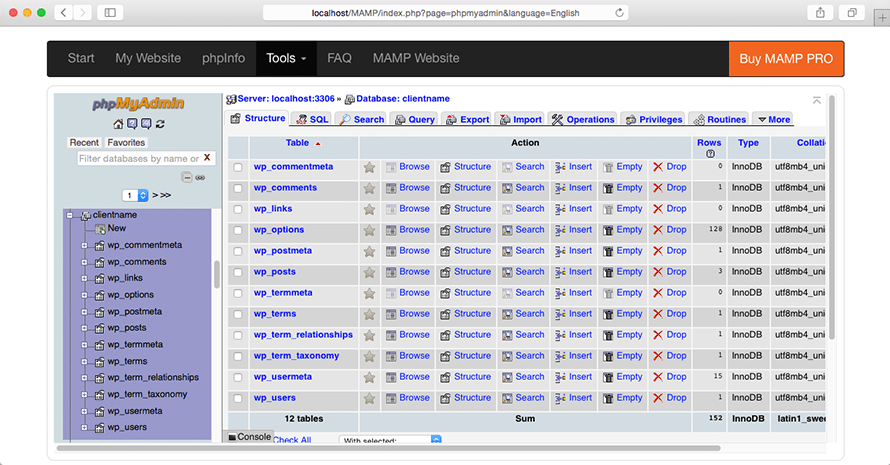
phpMyAdmin on local server
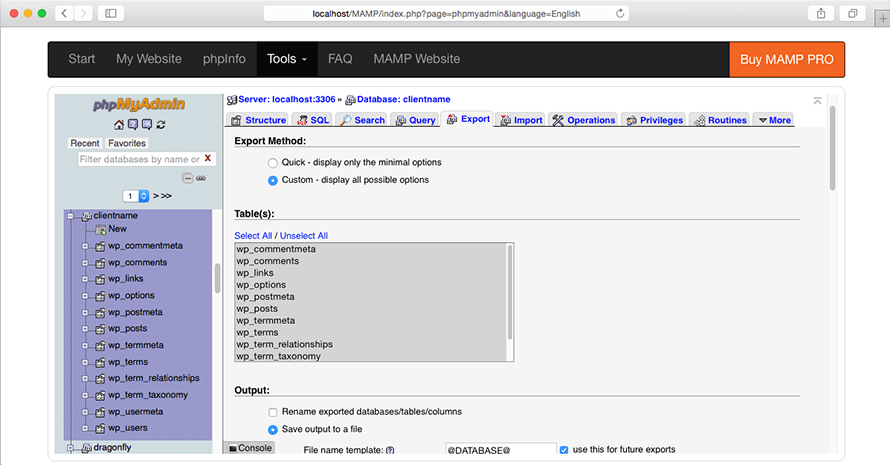
Export database
- Local Site Backup:
- Local Database Backup
- Browse to : http://localhost/phpMyAdmin
- Select database
- Export database as {databasename}.sql
- Local Files Backup
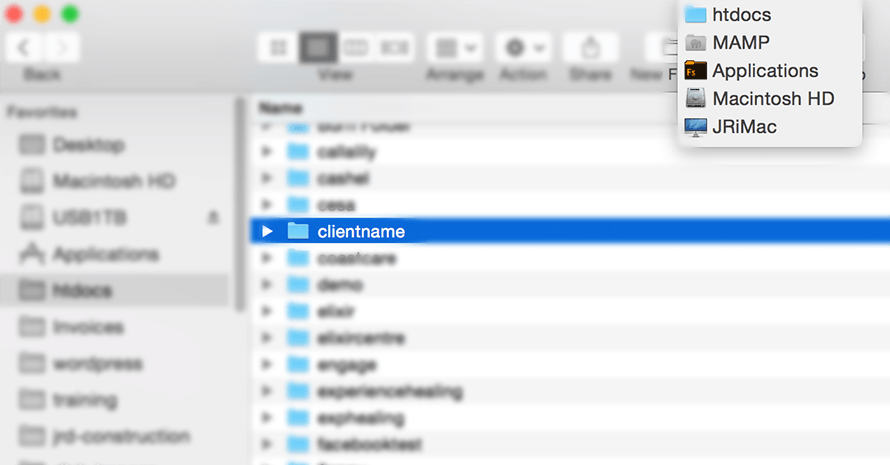
- Copy files from site root
PC : C:\ wamp \ www \ {foldername}
Mac: Applications : MAMP : htdocs : {foldername}
- Copy files from site root
- Local Database Backup
- Remote Site Restore
- Log In to CPanel / Plesk or whatever control panel your ISP has provided
- Database Restore
- Browse to phpMyAdmin on Server Control Panel
- Select database
- Import saved database : {databasename}.sql
- Select wp-options table
- Change siteurl and home values to live/staging address : http://{sitename}
- Files Restore
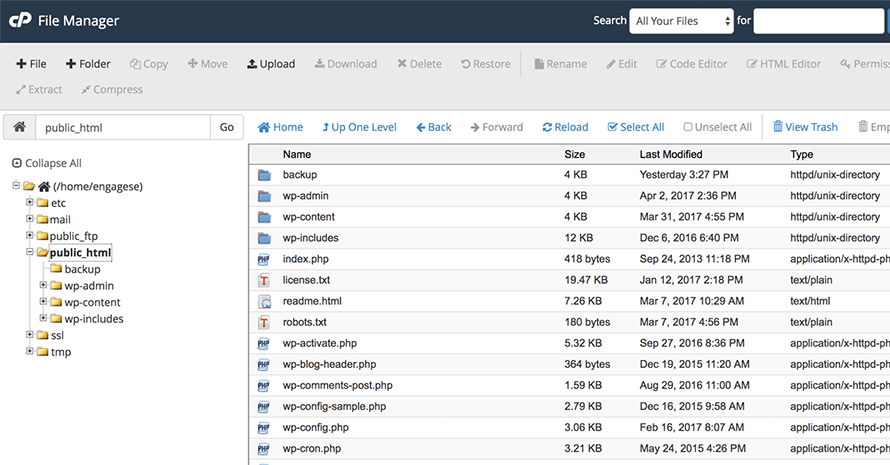
- Either: Upload files to site root via FTP
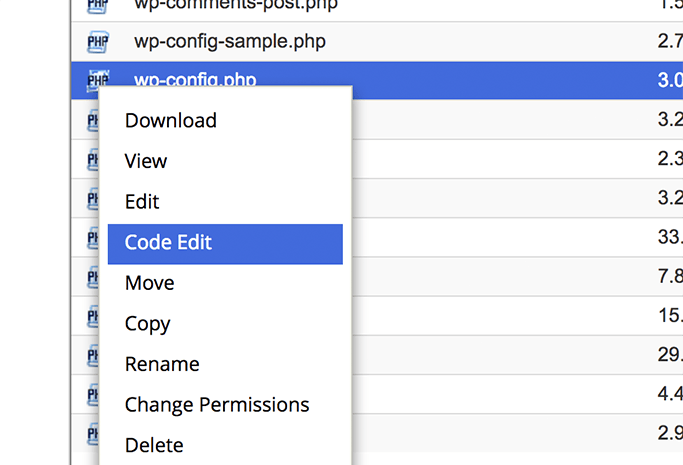
- Or: Upload files to site root via File Manager on Server Control Panel (compress to .zip first for faster upload)
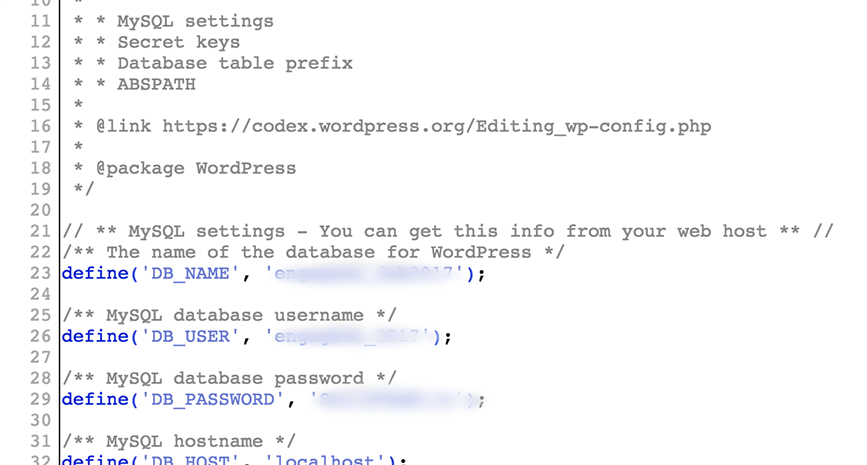
- Open: wp-config.php
- Check DB Name – change if necessary
- Check DB User – change if necessary
- Check DB Password – change if necessary
Local files
Remote Files
Scenario 2: Migrating a remote Wordpress site (either staging or live) to a local server.
Prerequisites:
A local server must be installed and running on the local machine. (ie MAMP on Macintosh, WAMP on windows).
A remote server must exist – either as a regular domain (http://mysite.com) or as a subdomain (http://test.mysite.com) or even as a folder within a domain (http://mysite.com/test)
- Remote Site Backup
- Log In to CPanel / Plesk or whatever control panel your ISP has provided
- Database Backup
- Browse to phpMyAdmin on Server Control Panel
- Select database
- Export database : {databasename}.sql
- Files Backup
- Either: Download files from site root via FTP
- Or: Download files from site root via File Manager on Server Control Panel (compress to .zip first for faster download)
- Local Site Restore:
- Local Database Restore
- Browse to : http://localhost/phpMyAdmin
- Select database
- Import saved database {databasename}.sql
- Select wp-options table
- Change siteurl and home values to live/staging address : http://localhost/{foldername}
- Local Files Restore
- Copy files to site root (and extract if they have been zipped)
PC : C:\ wamp \ www \ {foldername}
Mac: Applications : MAMP : htdocs : {foldername} - Open: wp-config.php
- Check DB Name – change if necessary
- Check DB User – change if necessary
- Check DB Password – change if necessary
- Copy files to site root (and extract if they have been zipped)
- Local Database Restore
Code edit – wp-config.php
Checking database credentials in wp-config
Best Practice Workflow
The most embarrassing thing that could happen is that you decide to install a plugin or theme to a live/production server environment and the site goes down.
Yes, this happened to in class just this week when a student decided to change their live site by adding and using an untested plugin.
What was even more exciting is that the installation also killed the WordPress dashboard, so she was unable to use it to simply disable and remove the plugin. On top of that, she did not have CPanel server access nor FTP access to the site so she couldn’t remove the offending plugin folder.
In short, her site went down, displaying only a white screen, while she made frantic calls to her IT department to get the appropriate server credentials.
How this WordPress website migration should have been managed:
A local version of the website (or at least a copy of the website installed on a test server) should have existed so that testing of the plugin could have been done prior to committing the installation on the live server.
Once efficacy of the plugin had been ratified, it would then have been cleared for installation on the live server.
My WordPress website migration standard workflow:
- Build the website locally on my own machine.
- If I’m taking on an existing site, I’ll download the site using Scenario 2 above and create a fully working local copy.
- I’ll make changes, add plugins, tweak or install themes – and then test the site on all browsers defined in the job scope (including mobile platforms).
- Once I’m happy with the result, I’ll..
- Create a staging or test Server environment
- This is most often a subdomain on my own server (something like http://{clientname}.jrdesign.com.au).
- Within this test environment, I’ll create a database and upload the files using Scenario 1 above.
- At this point, I can invite the client to look at and interact with the site, and even give access to them so they can add and edit content while still in production.
- Move staging site to live Site
- Using Scenarios 1 and 2 above, I’ll move the files to the live server, install the database and configure the settings, then test the site.
- Once everything is working exactly as planned, I’ll take a current version of the live site using Scenario 2 above so I now have the latest version of the site locally.
- If any major upgrades are planned, I’ll follow the Local -> Staging -> Live server production circle.
Special Tips on WordPress website migration:
- Play it safe, even if it may seem laborious.
- Document your work – take notes of what themes and plugins are installed, their versions etc.
- If you’re customising themes or plugins, make sure you’re commenting your code clearly, and are using Child Themes to maintain separation from the parent themes and / or plugins.
Download the X-Mind mind map (zipped): wordpress_migration.xmind
 | © 2014 John Ryan Design | All Rights Reserved | 100 percent Australian |